Act Cadenza Strife Wiki
Advertisement
This page covers facts and in-depth game usage of the character, Chloe Valens. For a comprehensive reference list of in-game commands, see Command List: Chloe Valens.
Chloe shuusouraizan

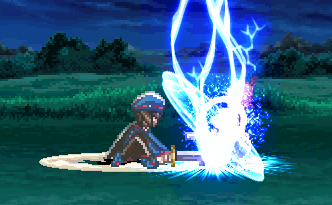
Chloe using Shuusouraizan

Chloe Valens (クロエ・ヴァレンス Kuroe Varensu) is the only playable character from Tales of Legendia. She first appeared on the Legacy as a knight and was looking for a man with a snake tatoo. Chloe started to have romantic feelings for Senel Coolidge ever since he saved her from drowning in a river and kept it a secret from the rest of the party so that the others wouldn't know that she cannot swim.

Chloe is a user of Iron Eres (similar to Artes in Tales of Legendia) and has an extrodinary talent with the sword. She is swift and can easily connect her artes together in a combo. Chloe is most suited for ground melee combat since she cannot use her artes in mid-air. Her stats are mostly average as compared to other ACS characters.

Chloe is recommended for intermediate and veteran players.

Character Facts[]

  • 490 HP total.
    Senel and Chloe

    Senel Coolidge punches forward.

  • She has only one victory pose.
  • She is one of the few ACS characters that can use counter attacks. The others being Rid Hershel, Barbatos Goetia and Sophie Lhant.
  • Chloe's support artes and one of her mystic artes allow her to summon Senel Coolidge from Tales of Legendia in battle.
  • If you look closely at some of Chloe's sprites, parts of her pants are missing. During the importing of the sprites, their color was made transparent.

General Tips & Usage[]

  • Being a disciplined knight, Chloe's gameplan revolves around proper spacing and strong defense. Her attack range rivals Eugene Gallardo, with a large melee attack range and long-range eres like Shippuusen and Kenbu.  If any of those or similar eres connect, then Chloe can begin applying scary pressure, with moves like GekkoujinShoubu, and Makinken Shunga to intercept the opponents guard, or use moves that recover quickly like Shippuusen and Chirisazame to bait counters. If Chloe is on the defensive end, she can use her Compound Eres to escape, as long as your prediction skills are on point.
  • Chloe's biggest weakness is her overall mobility. While she can approach in a flash from about the midscreen range, outside of that, she can have difficulty moving in without significant risk. Her air game is also very weak, as she has no eres whatsoever that can be used in the air. Noneletheless, Chloe can be one of the scariest characters to guard against. If you get in, be relentless.
  • Chloe has average jumping height, movement speed, dash length, damage output, and HP.
  • Chloe has an average to above average defense against Guard Break.
  • Chloe receives 40% more damage from Light Elemental attacks and 10% less damage from Water and Wind Elemental Attacks. (Please refer to this page for more information on ACS Elements).
  • Chloe can perform all the basic movements in ACS.
    • Her Double Jump reaches the top of the screen.
    • Her High Jump appears identical to her normal jump, but if looked at carefully, it is slightly higher.
    • Chloe's Forward Step and Backward Leap both have good range and speed. This is her primary evasive move against spells.
    • Her aerial dashes' range and speed are considered average.
  • Chloe has 3 Melee Ground Attacks (A, B, C) and 1 Melee Aerial Attack (A or B).
    • Chloe is capable of charging her C attack. After a second, it will automatically release, and will always Guard Break the enemy if they are blocking.
  • By entering either Overlimit Lv1 or Lv2, Chloe restores 50 HP.
  • During Overlimit, Chloe's move speed increases.
  • During Overlimit Lv2,Chloe can:
    • Use any Eres without comsuming TP(Mystic Arte Excluded)
    • Chain Master Arte repeatly (eg:Sword Rain:AlphaTiger RageSword Rain:AlphaTiger Rage)
  • Two of Chloe's Eres, Majinken Hayate and Raikouken, will not require you to be in Overlimit if Chloe has less than 100 HP.
  • Her chain order consists of:
    • Melee > Base > Master > Arcane > Mystic

Shortcuts[]

Command Ground
F Overlimit Lv1
← F Getsueijin
→ F Shippuusen
↑ F Gekkoujin
↓ F Overlimit Lv2

Base Eres[]

  • Majinken (Demon Fang)
    ACS_Chloe_Valens_Arte_Exhibition_(v.5.505b)_COMPLETE-0

    ACS Chloe Valens Arte Exhibition (v.5.505b) COMPLETE-0

    Chloe Valens' Arte Exhibition by Kratos1991.

    • A sword shockwave projectile is released on the ground.
    • Travels about 50% off the screen's length range.
    • During Overlimit, this eres' range will increase to 100% of the screen's length.
    • Slightly pushes the enemy back.
    • TTS is Fast. TTL is Average.
  • Kogahazan (Tiger Blade)
    • An upward slash, followed by a kick at the apex and then a downward slash.
    • A very common combo starter and very easy to use.
    • Can be connected after Kenbu if the enemy is against a wall.
    • TTS is Very Fast. TTL is Average.
  • Chirisazame (Sword Rain)
    • Four quick stabs.
    • Safe on block.
    • Used to deplete an enemy's marked penetrate counters.
    • TTS is Very Fast. TTL is Short.
  • Shippuusen (Shining Gale)
    • Quick stab forward, traveling about 30% of the screen's length.
    • A MUST for following up an Overlimit that is not against a wall. Always continue with Jinpuusen.
    • This eres is executed faster during Overlimit.
    • When the enemy is against a wall, you can connect this eres back to Chloe's melee attacks during Overlimit.
    • Safe on block.
    • At the proper distance, you can connect this eres after Raikouken.
      • Raikoken must hit the enemy more than once for this to work.
      • Use Majinken Souga before Raikouken to create the proper distance. Wait until the enemy stops being pushed back by Majinken Souga before using Raikouken.
      • Wait until the enemy stops being pushed back by Raikouken before using Shippuusen.
      • This will no longer work if the enemy is cornered against a wall or if the combo counter reaches 20 hits and above.
    • At the proper distance, you can connect this eres after Shuu'u Majinken during Overlimit.
      • Use any Base eres and then Majinken Souga before Shuu'u Majinken to create the proper distance.
      • Wait until the enemy stops being pushed back by Majinken Souga before using Shuu'u Majinken.
      • Wait until the enemy stops being pushed back by Shuu'u Majinken before using Shippuusen.
      • This will no longer work if the enemy is cornered against a wall.
    • Wind Elemental.
    • TTS is Fast and Very Fast during Overlimit. TTL is Short.
  • Kuuretsuzan (Alpha Tempest)
    • Three kicks followed by a downslash.
    • The proper timing to use this eres after Chloe's 3rd melee attack is to press the command when Chloe kicks in mid-air.
    • TTS is Fast. TTL is Average.
  • Shoubu (Eagle Rising)
    • Charge the opponent, throwing up her sword into the air. Hits twice.
    • Disables enemies if not connected properly to other eres.
    • Unblockable as the sword comes down.
    • Slow start up and cannot be connected from Chloe's 3rd melee attack.
    • TTS is Average. TTL is Short.
  • Kenbu (Ram Strike)
    • Charge the opponent, throwing them into the air.
    • Disables enemies if not connected properly to other eres.
    • Slow start up and cannot be connected from Chloe's 3rd melee attack.
    • Can be connected to Kogahazan if the enemy is cornered against a wall.
    • TTS is Average. TTL is Long.
  • Getsueijin (New Moon Blade)
    • Stabs the enemy, turns around and pulls out her sword.
    • At the proper distance, you can connect this eres after Shuu'u Majinken.
      • Use any Base eres and then Majinken Souga before Shuu'u Majinken to create the proper distance.
      • Wait until the enemy stops being pushed back by Majinken Souga before using Shuu'u Majinken.
      • Wait until the enemy stops being pushed back by Shuu'u Majinken before using Getsueijin. Use this arte's shortcut button for easier execution.
      • This will no longer work if the enemy is cornered against a wall.
    • Dark Elemental.
    • TTS is Fast. TTL is Average.
  • Genshouken (Phantom Blade)
    • Spin around 3 times.
    • At the proper distance, you can connect this eres after Shuu'u Majinken.
      • Use any Base eres and then Majinken Souga before Shuu'u Majinken to create the proper distance.
      • Wait until the enemy stops being pushed back by Majinken Souga before using Shuu'u Majinken.
      • Wait until the enemy stops being pushed back by Shuu'u Majinken before using Genshouken. This is a little tricky to execute, you must input the command very quickly for this to work.
      • This will no longer work if the enemy is cornered against a wall.
    • TTS is Fast. TTL is Average.

Master Eres[]

  • Jin'u (Gambit)
    • Stabs the enemy and pulls out her sword.
    • Slightly pushes the enemy back.
    • TTS is Fast. TTL is Average.
  • Majinken Souga (Twin/Double Demon Fang)
    • Two sword shockwave projectiles are released on the ground.
    • Travels about 50% off the screen's length range.
    • During Overlimit, this eres' range will increase to 100% of the screen's length.
    • Moderately pushes the enemy back.
    • TTS is Fast. TTL is Average.
  • Kogarenzan (Tiger Rage)
    • An upward and downward slash, followed by another upward slassh, a kick and a down slash.
    • Leaves you open afterwards unless you connect it to another eres.
    • Very easy to use and is common during combos.
    • TTS is Very Fast. TTL is Average.
  • Kogaraizan
    • Kogahazan followed by a lightning strike.
    • Leaves you open for a split second. Prepare to block or use an Arcane.
    • Wind Elemental.
    • TTS is Very Fast. TTL is Short.
  • Akisazame (Sword Rain: Alpha)
    • Seven quick stabs, the last of which sends the enemy into the air.
    • Good for catching falling enemies.
    • Used to deplete an enemy's marked penetrate counters.
    • TTS is Very Fast. TTL is Average.
  • Jinpuusen (Shining Storm)
    • A charging stab followed by three slashes.
    • Chloe travel's about 40% of the screen's length.
    • During Overlimit, this arte is executed faster and Chloe will travel up to 80% of the screen's length.
    • Always use to follow up Shippuusen after entering Overlimit.
    • At the proper distance, you can connect this eres after Raikouken.
      • Raikoken must hit the enemy more than once for this to work.
      • Use Majinken Souga before Raikouken to create the proper distance. Wait until the enemy stops being pushed back by Majinken Souga before using Raikouken.
      • Wait until the enemy stops being pushed back by Raikouken before using Jinpuusen.
      • This will no longer work if the enemy is cornered against a wall or if the combo counter reaches 20 hits and above.
    • At the proper distance, you can connect this eres after Shuu'u Majinken during Overlimit.
      • Use any Base eres and then Majinken Souga before Shuu'u Majinken to create the proper distance.
      • Wait until the enemy stops being pushed back by Majinken Souga before using Shuu'u Majinken.
      • Wait until the enemy stops being pushed back by Shuu'u Majinken before using Jinpuusen.
      • This will no longer work if the enemy is cornered against a wall.
    • TTS is Fast and Very Fast during Overlimit. TTL is Short.
  • Shinkuuretsuzan (Omega Tempest)
    • Multiple rising kicks that sends the foe flying.
    • The last hit knocks the enemy down. Cannot be followed up unless the enemy is against a wall.
    • Great knockback effect and disables enemies.
    • Due to short duration and high damage, this arte is the best arte to loop in Overlimit Lvl2.
    • TTS is Fast. TTL is Average.
  • Gekkoujin
    • Slash through the enemy and stab them through the back.
    • Chloe ends on the same side she started from.
    • Impossible to combo from any Base Eres; Majinken Souga's input will be read instead.
    • Sometimes, this eres will break an enemy's defense due to the slight side shift when performing this eres. You have to be really close to the enemy for this to work.
    • Light Elemental.
    • TTS is Fast. TTL is Short.
  • Shuusouraizan (Lightning Tiger Blade)
    • Charge the enemy, kick them into the air, and land with a lightning strike.
    • Moves halfway across the screen. Good for moving closer to the enemy during mid-combo.
    • Transforms into Shuusou Gouraizan during Overlimit.
    • Wind Elemental.
    • TTS is Fast. TTL is Short.
  • Shuusou Gouraizan
    • Same as Shuusouraizan, with the addition of two more lightning strikes.
    • Moves halfway across the screen. Good for moving closer to the enemy during mid-combo.
    • Chloe's strongest Master eres.
    • Requires Overlimit to use.
    • Wind Elemental.
    • TTS is Fast. TTL is Short.

Arcane Eres[]

  • Majinken Kenbu (Demon Fang Blast)
    • Charges the enemy and produces a powerful shockwave, throwing the enemy 80% of the screen's length.
    • Good for throwing a CPU to the wall and setting up a wall combo.
    • At the proper distance, you can connect this eres after Shuu'u Majinken.
      • Wait for the enemy to stop being knocked back from Shuu'u Majinken before pressing the command for Majinken Kenbu.
      • Unlike the other eres that can be connected to Shuu'u Majinken, this will still work even if the enemy is against a wall.
    • At the proper distance, you can connect this eres after Raikouken.
      • Raikoken must hit the enemy more than once for this to work.
      • Use Majinken Souga before Raikouken to create the proper distance. Wait until the enemy stops being pushed back by Majinken Souga before using Raikouken.
      • Wait until the enemy stops being pushed back by Raikouken before using Jinpuusen.
      • This will no longer work if the enemy is cornered against a wall or if the combo counter reaches 20 hits and above.
    • TTS is Very Fast. TTL is Very Short.
  • Majinken Shunga (Demon Fang Fury)
    • Produces a slow moving shockwave.
    • The shockwave travels across the entire screen.
    • This eres is unblockable. Try intentionally delaying your cancel into this eres to reset the combo, then cancel into a Mystic Eres.
    • If the enemy lands on top of the attack, they will be frozen in mid-air for a moment, before continuing to fall to the ground.
    • At the proper distance (with the help of other eres), you may chain Chloe's Overlimit even if the enemy is not against a wall. Quickly dash towards the enemy or use Shippuusen afterwards to continue the combo.
    • Costs TP.
    • TTS is Slow. TTL is Average.
  • Majinken Hayate
    • Charges the enemy, producing a shockwave, and followed by two slashes.
    • Chloe charges 40% screen lengths while the shockwave reaches across the screen.
    • Chloe is in an advantage on block.
    • At the proper distance, you can connect this eres after Raikouken.
      • Raikoken must hit the enemy more than once for this to work.
      • Use Majinken Souga before Raikouken to create the proper distance. Wait until the enemy stops being pushed back by Majinken Souga before using Raikouken.
      • Wait until the enemy stops being pushed back by Raikouken before using Majinken Hayate.
      • This will no longer work if the enemy is cornered against a wall or if the combo counter reaches 20 hits and above.
    • At the proper distance, you can connect this eres after Shuu'u Majinken.
      • Use any Base eres and then Majinken Souga before Shuu'u Majinken to create the proper distance.
      • Wait until the enemy stops being pushed back by Majinken Souga before using Shuu'u Majinken.
      • Wait until the enemy stops being pushed back by Shuu'u Majinken before using Majinken Hayate.
      • This will no longer work if the enemy is cornered against a wall.
    • This eres disables enemies.
    • Costs TP.
    • TTS is Very Fast. TTL is Very Short.
  • Shuu'u Majinken (Sword Rain Demon)
    • A combination of Akisazame and Majinken.
    • The shockwave travels 50% of the screen's length.
    • During Overlimit, the shockwave travels 100% of the screen's length.
    • Moderate knockback effect.
    • At the proper distance, Shippuusen, Jinpuusen, Getsueijin, Genshouken, Majinken Hayate and Majinken Kenbu can be connected after this eres.
      • Achieving the proper distance is different for each eres.
      • Except for Majinken Kenbu, the enemy must not be against a wall for this to work.
      • The distance and timing of Shippuusen and Jinpuusen are more lenient when Chloe is in Overlimit.
    • TTS is Very Fast. TTL is Average and becomes Long if used at the proper distance.
  • Shuu'u Kogahazan (Sword Rain Tiger)
    • A combination of Akisazame and Kogahazan.
    • After the shockwave, there is an extended length of time you can use to continue with a Mystic Eres with extended input requirements.
    • TTS is Very Fast. TTL is Average.
  • Koga Kuuretsuzan (Tiger Tempest)
    • A modification of Kogarenzan with Genshouken.
    • After kicking the enemy into the air, Chloe slashes them down, and slams her foot on the ground, producing a tiger blast. After, she slashes them into the air before kicking them to the ground.
    • The final hit pushes the enemy away slightly and disables them.
    • Against AI, this eres is the best finisher.
    • If you spam press A after this eres, most AI will always be hit 85% of the time unless they use any of the following below.
      • A counter attack arte/eres.
      • Any arte/eres with Very Fast TTS.
      • A Mystic Arte/Eres (Since most Mystic Artes/Eres have Very Fast TTS).
    • TTS is Fast. TTL is Short.
  • Shuu'u Genshouken (Sword Rain Phantom)
    • A combination of Chirisazame and Genshouken.
    • After the final hit is an extended length of time you can use to continue with a Mystic Eres with extended input requirements.
    • This is the best eres to chain to a Mystic Eres.
    • TTS is Very Fast. TTL is Average.
  • Kirisazame (Sword Rain: Omega)
    • Twenty-one quick stabs, the last of which knocks the enemy into the air.
    • The period after the attack in which the enemy can be hit with a Hi Ougi is very short.
    • Used to deplete an enemy's marked penetrate counters.
    • TTS is Very Fast. TTL is Short.
  • Shoubu Jinpuusen (Shining Storm Rising)
    • Throws her sword up at the enemy and follows by multiple slashes.
    • Costs TP.
    • TTS is Fast. TTL is Short.
  • Jin'u Kuuretsuzan
    • Stab the enemy and kick them three times.
    • Hold → to greatly knock the enemy back and disable them.
    • TTS is Very Fast. TTL is Average and Short if → is held down..
  • Getsueishoubu (New Moon Rising)
    • Very similar to Shiden Getsueijin.
    • Leaves you facing the wrong direction and out of range for most Mystic Eres.
    • Disables enemies after the last hit.
    • TTS is Fast. TTL is Very Short.
  • Shiden Getsueijin (New Moon Lightning)
    • A quick slash, kick, turn and backstab.
    • Cannot be followed up by most Mystic Eres due to the movement out of range.
    • It is easiest to input if you hold back, then quickly followed by the rest.
    • Disables enemies after the last hit.
    • Fire Elemental.
    • TTS is Fast. TTL is Very Short.
  • Genshouranbu
    • Spin around six times.
    • The last hit throws the enemy along the ground away from Chloe.
    • Good power.
    • TTS is Fast. TTL is Short.
  • Raikouken (Plasma Blade)
    • Stabs forward, followed by five thunder strikes, hitting a different area in front of her.
    • It is not possible to hit more than twice.
    • At the proper distance, you can chain this eres to Shippuusen, Jinpuusen, Majinken Hayate and Majinken Kenbu.
      • This is no longer possible if the combo counter is 20 hits and above or if the enemy is against a wall.
    • Wind Elemental.
    • TTS is Fast. TTL is Long but becomes Short if the combo counter exceeds 19 hits.
  • Shugohoujin (Guardian Field)
    • Summons a protective circle that heals you by 25 HP.
    • Each hit to the enemy knocks them a little out of range, usually resulting in three or four hits.
    • Can hit up to five times if they're against a wall.
    • Can only be used during Overlimit and if Chloe has low HP.
    • Cannot be chained to any other eres.
    • TTS is Fast. TTL is Non-existent.

Compound Eres[]

Compound Eres cannot effectively cancel quick, repeating attacks, like Akisazame and cannot be linked to a Mystic Eres or Overlimit.


  • Rinjin Senyougeki (Cold Blood Rush)
    • Counter-attack with a shockwave and multiple stabs.
    • Chloe flashes white, during which time, if hit, she will avoid taking damage by counter-attacking.
    • If timing requires you to counter just as or after the enemy swings.
    • If you fail or no attack is inflicted to Chloe during the white flash, Chloe will be vulnerable for a second.
    • The last hit throws the enemy along the ground to the far side of the screen.
    • No other actions can be executed after a counter attack.
    • TTS is Very Fast. TTL is Non-existent.
  • Youken Eiyougeki (Shadow Steel)
    • Multiple slashes followed by three spins.
    • The last spin throws the enemy along the ground to the far side of the screen
    • While blocking and attack, press E to initiate a counter-attack.
    • Chloe is invulnerable to most attacks while executing this eres.
    • No other actions can be executed after a counter attack.
    • Costs TP.
    • TTS is Very Fast. TTL is Non-existent.

Support Eres[]

  • Hakugekishou (Impact)
    • Senel Coolidge appears and charges forward, knocking the enemy to the ground.
    • Very difficult to combo out of.
    • Disables enemies.
    • TTS is Slow. TTL is Long.
  • Shinryuugeki (Divine Dragon)
    • Senel Coolidge appears and charges the enemy, knocking them into the air.
    • Of the two Cameo Artes, this one has the best combo potential.
    • If Chloe is right beside Senel as he uppercuts the enemy, she will be pushed back a little.
    • After Senel uppercuts, You can use Chloe's aerial melee attack to continue the combo on the ground.
    • Ideally used on a wall after an Overlimit Burst.
    • Using Getsueishoubu as the last eres perfectly sets up for this arte.
    • TTS is Slow. TTL is Long.

Mystic Eres[]

  • Kensei Yuumeizan
    • Three slashes followed by two powerful thrusts.
    • Uses too much TP used for the amount of damage done.
    • Don't use this eres as part of a combo since the damage will be decreased as the combo counter increases.
    • Use this eres to cancel an enemy's marked penetrate status effect.
    • TTS is Very Fast. TTL is Non-existent.
  • Kouka Renmeibu
    • Multiple stabs, spins, slashes before kicking them in the air followed by three fiery kicks.
    • The damage of this eres decreases as the combo counter increases.
    • Using this on an enemy near (not cornered) against a wall will allow you to continue the combo using Overlimit.
    • This eres has an exploitable bug that freezes an enemy upon the last hit. To use the bug, follow the steps below.
      • Chloe Bug

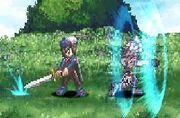
        Chloe's Kouka Renmeibu bug.

        Step 1: Use this eres on an enemy at a very specific location on the map near the wall. The place in front of where Chloe is standing is the perfect spot for the right wall.
      • Step 2: Just as Chloe is about to drop from mid-air, if you see Chloe almost shifting sides with the enemy, the bug will activate and the screen will always be tinted in red.
      • The enemy will always be inflicted with the Grab status effect unless you attack him/her. This will cancel the bug but the screen will still be tinted in red.
      • If you attack the enemy and cause the disabled status effect, the enemy will still be considered in grabbed status effect. The combo counter will not reset until you damage the enemy with a non-disabling attack.
    • TTS is Very Fast. TTL is Non-existent but can become Very Short if used at a certain portion of the map and Long if the Kouka Renmeibu bug is exploited.
  • Musou Jinretsusen
    • Multiple ranged slashes followed by a thrust and an explosion.
    • Deceptively small hitbox.
    • The best eres to use since the damage is high and only TP is required to use this eres.
    • TTS is Very Fast. TTL is Non-existent.
  • Shin'ou Tenshouyoku
    • Chloe and Senel Coolidge attack together in the form of a burning phoenix.
    • After an initial slash by Chloe, they hit the enemy upwards followed by diagonally up.
    • Knocks the enemy to the far side of the screen.
    • Chloe's strongest eres. Requires Overlimit to use.
    • TTS is Very Fast. TTL is Non-existent.

Advanced Tips & Combos[]

Battle Strategy[]

General Use Combos []

Easy Combos[]

  • Melee Attack X3 > Kogahazan > Akisazame > Shuu'u Genshouken > Kouka Renmeibu
    • Quick Input Version:
    • A > A > A > ↓ A > → ← → B > ↓ → ← D > ↓ → ← E
    • 42 hits, 184 damage.
    • Gives a lengthy period to input for Kouka Renmeibu.
  • Shippuusen > Jinpuusen > Any Arcane Eres
    • Quick Input Version:
    • ↓ ← A > ↓ ← B > Any Arcane Arte
    • 4 hits, 19 damage.
    • Use for either covering a large area (60% screen length, 80% hit-able), after an Overlimit, or to catch your opponent off guard, to continue your combo.

Shuu'u Majinken Getsueijin Link[]

  • Melee Attack X3 > Kuuretsuzan [Note 1] > Majinken Souga [Note 2] > Shuu'u Majinken [Note 2] > Getsueijin [Note 3] > Shuusouraizan > Koga Kuuretsuzan > Musou Jinretsusen
  • Quick Input Version:
  • A > A > A > ↓ ← → A > ↓ → B > ← → ← D > ← F > ↓ ← → C > ↓ ← → D > ↓ → ↓ ← E
  • 31 Hits if no Mystic eres are used. Damage is 1/9 of Kakashi Scarecrow's HP (500).
    • Requirements:
      • Enemy must not be cornered against a wall.
      • TP for Musou Jinretsusen (Optional)
    • Notes:
      • Note 1: Input the command as soon as Chloe's feet lifts in the air.
      • Note 2: Majinken Souga and Shuu'u Majinken's knockback should be maximized before using the next eres.
      • Note 3: Using Getsuejin's shortcut button is easier.
  • Chloe's bread and butter combo. Very easy to use and you'll find yourself doing this combo a lot.
  • Musou Jinretsusen is optional. If you end the combo using Koga Kuuretsuzan, spam press A to use the combo again. This usually works all the time against AI.
  • Contributed by: Minarie 04:59, August 17, 2011 (UTC)

Non-Overlimit Wall Combo[]

  • Melee Attack x2 > Shoubu > Majinken Souga > Shuu'u Majinken > (Genshouken > Majinken Souga > Shuu'u Majinken) x2 > Majinken Kenbu > Any Mystic Eres or Overlimit

Inputs

  • A > A > ↓ ← E > ↓ → B > ← → ← D > (↓ → ← A > ↓ → B > ← → ← D) x2 > ↓ → C

Info

  • Total Hits = 43. Does 161 damage without a Mystic Eres.
  • Does 220 with Kensei Yuumeizan added.
  • Does 239 with Kouka Renmeibu added.
    Non-Overlimit_Wall_Combo_-_Chloe_Valens

    Non-Overlimit Wall Combo - Chloe Valens

    Example.

  • Does 346 with Musou Jinretsusen added.
  • Enemy must be cornered by a wall.
  • Doesn't work on Shizel for some reason.

Notes

  • Chloe's 3rd Melee Attack doesn't have enough TTL to combo into Shoubu. Stop at the 2nd attack instead.
  • Cancel Shoubu into Majinken Souga as fast as you can. These two eres will leave Chloe at the perfect distance for Shuu'u Majinken to have enough TTL.
  • Shuu'u Majinken leaves Chloe at a large advantage when it hits, enough time to connect a Genshouken. This is a link, not a cancel, so timing is required. Watch Chloe's sword after Shuu'u Majinken. Input the command for Genshouken when Chloe draws her sword back. Apply the same timing for connecting Majinken Kenbu.


Majinken Kenbu Wall Combo[]

  • Senel Coolidge: Shinryuugeki [Note 1] > Ground Melee Attack A or Shippuusen [Note 2] > Forward Jump > Aerial Melee Attack A [Note 3] > Melee Attack X3 > Kuuretsuzan [Note 4] > Majinken Souga [Note 5] > Shuu'u Majinken [Note 5] > Majinken Kenbu [Note 6] > Overlimit Lv1 > Senel Coolidge: Shinryuugeki > Ground Melee Attack A [Note 2] > Forward Jump > Aerial Melee Attack A [Note 3] > Melee Attack X3 > Kuuretsuzan [Note 4] > Majinken Souga [Note 5] > Shuu'u Majinken [Note 5] > Majinken Kenbu [Note 6] > Senel Coolidge: Shin'ou Tenshouyoku
  • Quick Input Version:
  • → D > A > ↑ → > A or ↓ ← A > A > A > A > ↓ ← → A > ↓ → B > ← → ← D > ↓ → C > F > → D > A > ↑ → > A > A > A > A > ↓ ← → A > ↓ → B > ← → ← D > ↓ → C > ↓ ← ↓ → E
  • Total Hits = 60. Damage is 6/7 of Kakashi Scarecrow's HP (500).
    • Requirements:
      • Enemy must be against a wall.
      • Enemy must be disabled before the start of the combo.
      • Overlimit Bar set at Lv1 or higher.
      • TP for Senel Coolidge: Shin'ou Tenshouyoku.
    • Notes:
      • Note 1: It's best to combo the enemy to a wall and disable them with Shiden Getsueijin before summoning Senel to attack.
      • Note 2: You can use either actions enumerated above. Just be sure to hit the enemy before Senel does.
      • Note 3: There is a certain timing that you need to fulfill in order to connect the combo. Attack the enemy just after Senel performs the uppercut. Refer to the Instant Kill Combo video for an actual simulation.
      • Note 4: Input the command as soon as Chloe's feet is lifted in the air.
      • Note 5: Majinken Souga and Shuu'u Majinken's knockback should be maximized before using the next eres.
      • Note 6: Use this eres as soon as possible.
  • Chloe's standard wall combo 1. Not that difficult to perform, especially if you remove the part where Senel is summoned.
  • See the instant kill combo video for a simulation on how to use Senel.
  • Contributed by: Minarie 04:44, August 18, 2011 (UTC)

Kenbu Kogahazan Wall Combo[]

  • Senel Coolidge: Shinryuugeki [Note 1] > Ground Melee Attack A or Shippuusen [Note 2] > Forward Jump > Aerial Melee Attack A [Note 3] > Melee Attack X2 > Kenbu > Kogahazan [Note 4] > Shuusouraizan > Shuu'u Genshouken > Overlimit Lv1 > Senel Coolidge: Shinryuugeki [Note 1] > Ground Melee Attack A or Shippuusen [Note 2] > Forward Jump > Aerial Melee Attack A [Note 3] > Melee Attack X2 > Kenbu > Kogahazan [Note 4] > Shuusou Gouraizan > Shuu'u Genshouken > Senel Coolidge: Shin'ou Tenshouyoku
  • Quick Input Version:
  • → D > A > ↑ → > A or ↓ ← A > A > A > ↓ → E > ↓ A > ↓ ← → C > ↓ → ← D > F > → D > A > ↑ → > A or ↓ ← A > A > A > ↓ → E > ↓ A > ↓ ← → C > ↓ → ← D > ↓ ← ↓ → E
  • Total Hits = 62. Damage is 6/7 of Kakashi Scarecrow's HP (500).
    • Requirements:
      • Enemy must be against a wall.
      • Enemy must be disabled before the start of the combo.
      • Overlimit Bar set at Lv1 or higher.
      • TP for Senel Coolidge: Shin'ou Tenshouyoku.
    • Notes:
      • Note 1: It's best to combo the enemy to a wall and disable them with Shiden Getsueijin before summoning Senel to attack.
      • Note 2: You can use either actions enumerated above. Just be sure to hit the enemy before Senel does.
      • Note 3: There is a certain timing that you need to fulfill in order to connect the combo. Attack the enemy just after Senel performs the uppercut. Refer to the Instant Kill Combo video for an actual simulation.
      • Note 4: Input the command as soon as possible. You can spam press the command if you want.
  • Chloe's standard wall combo 2. Not that difficult to perform, especially if you remove the part where Senel is summoned.
  • See the instant kill combo video for a simulation on how to use Senel.
  • Contributed by: Minarie 04:44, August 18, 2011 (UTC)

Long Combo[]

  • 【ACS】Chloe_Combo_2

    【ACS】Chloe Combo 2

    Chloe Valens 88 Hit Combo (compliments of phantom23117).

    Majinken > (Shippuusen > Majinken Souga > Raikouken) X2 > Dash towards enemy > Melee Attack X3 > Kuuretsuzan > Majinken Souga > Shuu's Majinken > Genshouken > Shuu'u Majinken > Getsueijin > Jinpuusen > Shoubu Jinpuusen > Overlimit Lv1 > Shippuusen > Melee Attack X3 > Kenbu > Kogahazan >Shuusou Gouraizan > Genshourenbu > Musou Jinretsusen
  • Quick Input Version:
  • ↓ → A > ( ↓ ← A > ↓ →B > ↓ → ↓ →C ) X2 > → →> A > A > A > ↓ ← → A > ↓ →B > ← → ← D > ↓ → ← A > ← → ← D > ← F > ↓ ← B > ↓ ← C > F > ↓ ← A > A > A > A > ↓ → E > ↓ A > ↓ ← → C > ↓ → ← C > ↓ → ↓ ← E
  • Around 88 hits (depending on how many hits of Raikouken hit). Around 480 HP damage (depending on how many hits of Raikouken hit).
    • Requirements:
      • Requires all TP.
      • One Overlimit bar.
      • Low (less than 100) HP.
  • Contributed by: phantom23117

Non-wall Overlimit Starter Combos[]

  • Melee Attack X3 > Majinken > Jin'u > Majinken Shunga > Overlimit Lv1 > Melee Attack X3 > ....
    • Quick Input Version:
    • A > A > A > ↓ → A > ← ↓ → C > ↓ → D > F > A > A > A > ....
    • A good combo to link your Overlimit with melee attacks when the enemy is not against a wall.
    • Maximize the knockback of both Majinken and Jin'u.
    • Use Overlimit as soon as Majinken Shunga hits the enemy.
    • Contributed by: Minarie 04:58, August 18, 2011 (UTC)
  • Melee Attack X3 > Getsueijin > Majinken Shunga > Overlimit Lv1 > Shippuusen > ...
    • Quick Input Version:
    • A > A > A > ← F > ↓ → D > F > ← ↓ A > ...
    • The easiest way to link Overlimit with Shippuusen when the enemy is not against a wall.
    • Contributed by: Minarie 04:58, August 18, 2011 (UTC)

Instant Kill Combo[]

  • ( Melee Attack X3 > Majinken [Note 1] > Jin'u [Note 1] > Majinken Shunga ) or ( Melee Attack X3 > Getsueijin > Majinken Shunga ) > Overlimit Lv1 [Note 2] > ( Shippuusen [Note 3] > Majinken Souga [Note 3] > Raikouken [Note 4] ) X2 > ( Shippuusen [Note 5] > Majinken Souga [Note 5] > Shuu'u Majinken ) X3 > Getsueijin > Shuusouraizan > Genshourenbu > Overlimit Lv1 > Senel Coolidge: Shinryuugeki > Ground Melee Attack A [Note 6] > Forward Jump > Aerial Melee Attack A [Note 7] > Melee Attack X3 > Kuuretsuzan [Note 8] > Majinken Souga [Note 5] > Shuu'u Majinken > Majinken Kenbu > Senel Coolidge: Shin'ou Tenshouyoku
  • Quick Input Version:
  • ( A > A > A > ↓ → A > ← ↓ → C > ↓ → D ) or ( A > A > A > ← F > ↓ → D ) > F > ( ← ↓ A > ↓ → B > ↓ → ↓ →C ) X2 > ( ← ↓ A > ↓ → B > ← → ← D ) X3 > ← F > ↓ ← → C > ↓ → ← C > F > → D > A > ↑ → > A > A > A > A > ↓ ← → A > ↓ → B > ← → ← D > ↓ → C > ↓ ← ↓ → E
  • Total Hits = 100. Damage instantly kills Kakashi Scarecrow (HP 500).
    • Requirements:
      • Combo must start at the other side of the map (as if Chloe is against a wall).
        Tales_of_ACS_v5.503_Chloe_Valens_Instant_Kill_Combo_(100_Hits)

        Tales of ACS v5.503 Chloe Valens Instant Kill Combo (100 Hits)

        Chloe's instantl kill combo at 100 hits.

      • Overlimit Bar set at Lv2.
      • 85% TP.
    • Notes:
      • Note 1: To connect this properly with Majinken Shunga, maximize the knockback of both Majinken and Jin'u.
      • Note 2: Unleashe Overlimit as soon as Majinken Shunga hits the enemy.
      • Note 3: At the first time you use Shippuusen, the timing is to use it as soon as possible. At the second time, use Shippuusen just as the enemy stops being pushed back from Raikouken.
      • Note 4: If the above steps are done correctly, Raikouken should always hit the enemy twice.
      • Note 5: At the first time you use Shippuusen, the timing is to use it as soon as possible. At the second time, press the command just as the enemy stops being pushed back and at the 3rd time, press the command just a little bit earlier than the second time you used it. Maximize the knockback effect of Majinken Souga before using Shuu'u Majinken.
      • Note 6: Be sure to hit the enemy before Senel does or else the combo will be affected. Simultaneously hitting the enemy with Chloe's normal attack and Senel's Shinryuuheki will also end up in failure.
      • Note 7: There is a certain timing that you need to fulfill in order to connect the combo. Attack the enemy just after Senel performs the uppercut.
      • Note 8: Input the command as soon as Chloe's feet is lifted in the air.
  • Chloe's instant kill combo. Not very difficult to use but not easy either.
  • Contributed by: Minarie 17:18, August 18, 2011 (UTC)
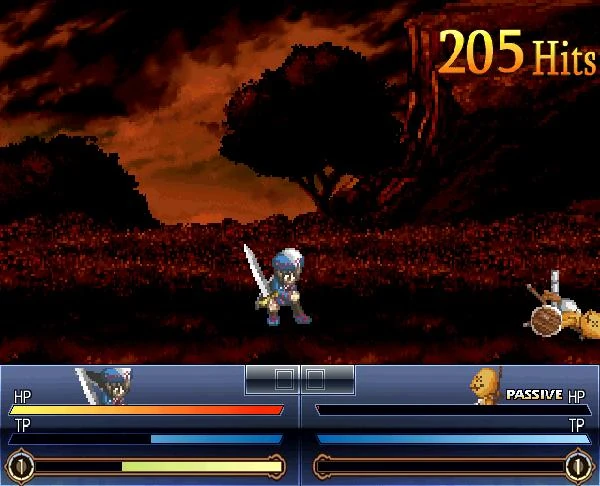
Highest Combo[]

Story Mode[]

Chloe has a total of 7 Story Modes, ranging from Easy to Unknown 2. Note that all modes including and preceding Hard feature opponents that come in "Rounds", meaning that the field, positions, and statistics (HP and otherwise) will reset once an opponent is defeated. Modes after Hard feature opponents that come one after another, meaning that the fields, positions, and statistics of your character will not reset once an opponent has been defeated. However, A portion of your HP is refunded whenever an opponent is defeated in Mania Mode.

Easy[]

Suzu Fujibayashi
Kohak Hearts
Stan Aileron
Synch as Enemy, Eugene Gallardo as Ally.

Normal[]

Stan Aileron
Zelos Wilder
Lloyd Irving
Yuris

Hard[]

Shing Meteoryte
Judith
Guy Cecil
Shizel (2 Rounds)
Nereid (Only upon defeat of Shizel with a 2-0 record)

Mania[]

Dhaos
Synch (Upon defeat of Dhaos)
Barbatos Goetia(Upon defeat of Synch)
Shizel (Upon defeat of Barbatos Goetia)

Unknown[]

Barbatos Goetia
Shizel (Upon defeat of Barbatos Goetia)
Dhaos (Upon defeat of Shizel)
Synch (Upon defeat of Dhaos)
Gelda Nebilim (Upon defeat of Synch)

Unknown 2[]

Judith
Collet Brunel (After ?? seconds have lapsed)
Suzu Fujibayashi (After ?? seconds have lapsed)
Sophie Lhant (After ?? seconds have lapsed)
Yuris (After ?? seconds have lapsed)

Cut-Ins[]

In ACS, Chloe, and her cameo support character Senel Coolidge, has two cut-ins.

  1. Custom made
  2. Custom made
Advertisement